Tuesday, December 22, 2009

What I like best

I think I've described before how I thrive on the small interactions that surface gently during each day... and how working at a market guarantees a large number of these interactions, whether they end up being good or bad. Yet, I don't think I've described another aspect that I like about these dealings with the public- I love hearing people's plans.

It starts quite simply. A person asks for a pound of pasta and a quarter pound of pancetta, and then puts the two items in a bag brimming with chard, leeks, cans of tomatoes, and the other ingredients that we base our lives upon. The person mentions: "I'm thinking of making this pasta dish I saw in a magazine the other day..." and we proceed to exchange ideas in the well-lit shop, surrounded by the hustle and bustle yet caught in a flurry of ideas that build upon each other like rungs in a ladder towards the dreamy culinary sky.

I like sitting next to someone in class who's deciding between studying in Russia and Portugal. I like talking to someone about writing a thesis, and how he or she might carry out the necessary fieldwork to sculpt ideas into a concrete reality. I like the way these words bounce off of our minds each day, assuming different states until the final product is established. As alarming as it is sometimes, I'm beginning to see the beauty in not having secure future plans. Our conversations are so much more interesting that way.

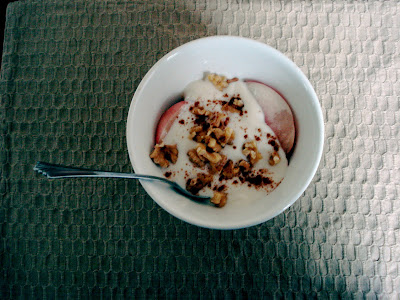
I have some pretty grandiose plans that are becoming an ever clearer reality. Thanks for all the support to my friends and family along the way towards this decision. I keep thinking I'm so selfish to carry it out, but I'm realizing more and more that we each earn our ways. I'm just going to post a picture of a nice breakfast for now, as I have very few days off from work to really enjoy the non-industrial kitchen, but I'll be back soon.

Wednesday, December 9, 2009

Cake, please.


A couple of weeks after I turned 18 I began fitting my life into little cardboard boxes.

Tucked away in the spaces between those cardboard constructs have been piles of clothing, stacks of books, neatly folded posters, boxes of tea, and other knick-knacks that somehow I've subconsciously labeled as "essential for life".... and with those boxes and the various objects that resided within I have joined in the seemingly necessary crusades that one must take across the country, world, and, more recently, a home state, to college, where I unpacked them, settled temporarily, re-packed them, and left again. Onto a new march.

I can't tell you how many times I've done this and how many times my friends have done this. I can't tell you how bizarre of a process it is....how, at the end of the day, I can't settle, I won't settle, and I somehow know that I shouldn't settle... not for the next few years at least. I can't wrench that idea from my mind... no matter how appealing it may be to do so.

But there's also that shocking and lingering realization. The realization that we can define our lives in stages- by the moments that we spend between the ever-looming and oh-so ritualistic unpacking and re-packing of those cardboard boxes.... and the fact that we can derive so much comfort in the steps we've taken in the frigid air towards our front doors, with the turning of that brass doorknob, the opening of that creaky wooden door, the first heavy step we take into our apartments, and the bombardment of our senses with the familiar smells of a temporary home.

How enchanting, the blend of the permanent and temporary.

I'm about to pack again. Can you tell? First, I somehow have to get through four finals.... but until then I've discovered a slightly healthy (mostly, just "not unhealthy") cake to help. It requires very few ingredients, nothing exotic. Oh. and it tastes really good too.

Vegan Chocolate Cake
adapted from Cucina Nicolina

1 1/2 cups whole wheat flour (I used 1 cup flour and 1/2 cup wheat bran)
3/4 cup sugar (I think you could get away with 2/3rds)
1/4 cup unsweetened cocoa powder
2 tsp baking powder (or 1 tsp soda and 1 tsp vinegar)
1/2 tsp. salt
1/3 cup vegetable oil
1 tsp vanilla extract
1 cup water

Preheat oven to 350 degrees Fahrenheit

Mix dry ingredients in a medium-sized bowl. Add wet ingredients. Stir until mixture is incorporated. Pour in a pan and bake for 45 minutes (or until it passes the clean toothpick test).

Enjoy. I ate mine with almond butter. mmm.


Sunday, December 6, 2009

Hello, December?

Woah! What grandiose plans I had for November.... I wanted to fill your kitchens with wholesome, autumnal goodness... and instead I believe I left you with preserved lemons, first grade cookies, and roasted squash. Oops.

And now, friends, I'll take it one step lower. I'll present you with an empty bowl.


But I hope you get the implication. What I'm about to share with you is good. and fast. and inexpensive. Three qualities I like in the kitchen.

I've had chard on the brain ever since I had some braised chard that my amazing friend Liz made. We got together for a simple dinner, and being the naturally skilled cook that she is, Liz sauteed some garlic in a pan, added the chard, a sprinkle of red pepper flakes, and golden chicken broth. The result was so delicious.

I've stripped things down even more. You should try this. And if you feel like it you can send me a picture of the empty bowl. I deserve it :)

Sauteed Chard. No really!
adapted from cave-people

1 bunch of chard
1-2 tbs olive oil
red pepper flakes (to taste)
salt, pepper (ditto)
a splash of lemon juice or good vinegar

Wash the chard and cut or tear into 2-3 inch wide ribbons (don't dry the chard). Heat the olive oil in a pan so it's just coating the bottom. Add the chard, salt, red pepper flakes, and pepper. Cook for a few minutes until the chard is barely wilted. Add the lemon juice or vinegar at the end.

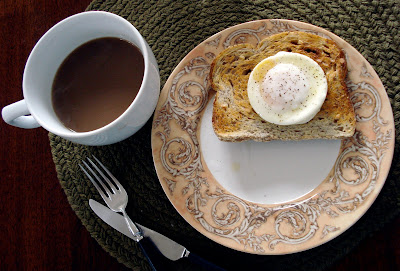
I'd serve this with a poached egg and a piece of toast.... or my new favorite thing to do is have a generous piece of brie with some bread on the side.

Enjoy!

Thursday, November 19, 2009

How to be a Frugal Gourmet

Step 1: Survey the contents of your pantry, noting that you only have almonds, green tea, and Spanish olive oil
Step 2: Peruse an incredible food blog in search of an esoteric, yet easily affordable recipe to use.

Step 3: Conduct an ingredients survey: salt...check, mason jar (or if you're extremely frugal, a tupperware container with an airtight lid)...check, various spices hiding in the cabinet...check, and lemons...?

Step 4: Conduct a search for free meyer's lemons
And take a few with you.

Step 5: Wash and scrub the lemons, cut off the end where the stem is and make a one-inch deep X-shaped incision at each end (but be careful not to quarter the lemon by accident). Stuff the incisions with salt (David Lebovitz says about 1 tbs. per lemon) and crush together inside the jar or container.

Step 6: Drop a few extra spices in the jar (a cinnamon stick, bay leaf, some cloves) and seal. Put in a corner.

Step 7: The next day, crush the lemons with the back of a spoon again, making sure that they're submerged in liquid. Seal the lid again and store away, repeating the occasional crush for the next couple of days.

Step 8: Set aside for a month. They'll be ready when they're soft. Discard the pulp and slice the rind into small pieces and add to a salad or pizza. When people ask what the heck you're doing, say: "I'm making preserved lemons. It's very gourmet."

Step 9: Write a note to a dear friend and, maybe, just maybe, call yourself a friminal :)

Tuesday, November 10, 2009

A sense of transition


Oh man. There's no stopping it.

I'm at the cusp of adulthood. You know, the edge of the cliff that leads to that world we never imagined we'd ever reach- where people have desk jobs, and go to graduate school, and pay all of the bills. The feeling is making me cherish the ups and downs of college more than ever. In fact, I'm holding onto these remaining school days for my dear life... stumbling about and writing crazy things about the experience, like the following:

Youth is the sip of that bitter coffee, and the thought that despite all of the tragedy in the world that swells like a spilled puddle of liquid and touches you with its very edges, you can still stare at the night sky and find the innermost serenity in nothing at all.

CRAZY right!? (I hope you know I omitted about 5 other sentences in the interest of your sanity). So I figured that I should take a break from navigating the streams of consciousness and return to what is truly good. Do you remember when we had a mandatory snack time in first grade? Well, I do. I mean, how could I not?

The other night, I was struck by a bit of inspiration (and that longing for a bit of sweetness after dinner that starts out like a small whim and as time passes somehow transforms into a giant, insatiable wildebeest!) So I decided, given the sparse contents of my pantry, to make a small batch of cookies. After a lengthy search, I discovered some peanut butter cookies on this site, and made them right away. For some reason, upon taking my first bite I was flooded with memories of elementary school... and the ten minute snack breaks we'd take to sit out on the benches in front of class and munch on graham crackers while peeling away the paint on the bench with our fingertips. Ah! The simplicity of it all!

And if you need this brief remembrance of things past, please don't hesitate to bake these cookies.

Peanut Butter Graham-Cracker-like Cookies

I'm giving them this unappealing title because with the addition of a bit of cocoa powder and cinnamon, the flavor of these changed dramatically from that of the original recipe! I also made a quarter batch, but I'm going to give you the recipe for the whole just in case.

Practically entirely stolen from 101 Cookbooks

2 cups whole wheat flour
1 tsp. baking soda
3/4 tsp. fine salt
1 cup natural peanut butter (I used 1/2 cup peanut and 1/2 cup almond butter)
1 cup honey
1/3 cup olive or canola oil
*1 1/2 tsp. vanilla extract (optional, I didn't have any on hand)
1 heaping tablespoon cocoa powder
1/2- 1 tsp. cinnamon (to taste)

Preheat oven to 350 degrees Fahrenheit

Mix the dry ingredients (flour, baking soda, salt, cocoa powder, and cinnamon) together in a bowl. Set aside.

Now here's the first place where I strayed from the recipe. I heated the oil, peanut butter, and honey on low heat so as to incorporate all of the ingredients. You certainly don't have to do this if you think everything will mix nicely. Either way, mix the wet ingredients in a bowl.

Combine the dry and wet ingredients, but don't over-mix. Heidi recommends that you chill the dough for an hour or so, but I took my tablespoon, shaped some cookies, and plopped them on the baking sheet to bake right away...and my cookies turned out just fine. Oh! and after placing the cookies on the baking sheet, make a quick flat indentation with your fork. They don't seem to flatten out much otherwise. You only want to cook them for 10 minutes or a little less- if not, they'll dry up!

Enjoy!

Friday, November 6, 2009

Wait for it

My mother, in her infinite wisdom, tried oh so very hard to instill an unwavering sense of patience in me. As she carefully placed the essential social norms in the bookshelves of my conscience, however, she probably found that the tome of patience somehow just never quite right. As a result, she's got a daughter that wants tomorrow to happen today, and even worse, that devours roasted squash right off the baking pan. Disgraceful!

I first made this recipe last winter, when it seemed like the warmth of the oven could solve all of the world's problems. I remember not expecting much, but then being pleasantly surprised by the complement of the nutty squash and the various layers of flavor from the vinaigrette. This time around I was patient enough to plate it (I had company!) But I had to fight temptation :)

Roasted Acorn Squash with Chile Lime Vinaigrette
adapted from Gourmet

1 large acorn squash
3 tbs. olive oil
1 garlic clove, minced
2 tbs. fresh lime juice
1 tbs. honey
1 thai red bird chile, minced

Preheat oven to 400 degrees Fahrenheit. Cut the ends off the squash and then slice along the ridges (I recommend using a good knife or recruiting someone who's pretty strong to do this, as acorn squash is a stubborn vegetable). Place the pieces in a bowl and toss with the olive oil, salt, and pepper (to taste). When the pieces are evenly coated, place them on a baking sheet, cut sides down, and put the sheet in the oven.

In the meantime, place the minced garlic in a bowl and smash with a bit of salt. Then add the lime juice and honey and stir. Taste the mixture- it should have a good combination of lime and sweetness. Add more lime if necessary. Then add the chile.

The squash takes about 30 minutes to cook, but I'd check about 15 minutes into the process and flip the pieces. You want them to be golden and tender.

When the squash is done, place it on a plate and carefully pour the dressing over the pieces.

Enjoy!

Friday, October 30, 2009

Fridays


On Fridays, I drift through the day in the most relaxing way. I notice the small things that I never saw when I had to hurry on Monday, study on Tuesday, and sit in a crowded exam room on Wednesday and Thursday. In the morning, the light streaks through my curtain-concealed window in just the right way, gently pulling me to consciousness. And when I set out for campus, my legs move in the perfect rhythm, and I can finally, finally find a good song to listen to.

After this latest exam-ridden storm, I think I might have lost a few things in the process... but at least for now, I can see the calm. Here's to that and the copious amounts of dark chocolate and green tea that got me through it. I don't have a recipe for you yet, but let me tell you, November is my favorite month, and thus you will be hearing from me quite regularly, with Fall themed recipes to write many a tune to.

Thanks for stopping by- it means the world to me.

Tuesday, October 20, 2009

A short break

Well, I'm knee deep in interest rate parity, current account balances, and the various ramifications of fiscal policy on the exchange rate, but I thought I'd take a break from sloshing around, grab onto the nearest ledge, and quickly share this granola recipe with you. You know, because it's imperative. I don't know why, but I find a bowl of cereal, milk, and fruit to be the most comforting thing on the planet. Granola is no exception to the rule... and as I've found that the store-bought kind tends to be overly sweet, homemade is now my favorite option. Plus, what more fulfilling way is there to fill every crevice of your home or student apartment with the pleasant aroma of spice and toasted grains?

What I like about this recipe is that it gives you the freedom to experiment- or test the ranges of the hippie spectrum. For example, if you'd like to add flax seeds and millet, please, hop down to the nearest food co-op and be my guest! If you'd like to finally peruse Trader Joe's selection of nuts and dried fruits, only to come up with an epic blend of tropical granola mayhem, go right ahead! Just be sure to let me know what you do.... because while I'm quite pleased with my mixture (sliced almonds, dried cranberries, dried golden raisins... simple!) I'd love to emerge from these swampy economic waters with a new recipe in hand.

Granola
adapted from multiple sources, but namely this one. This site has some excellent suggestions for add-ins.

3 cups old-fashioned oats
2 cups of nuts, fruits, grains, etc. that you'd like to add
1/3 cup wheat bran *(optional, but I like to think it's good for texture)
1 tsp cinnamon (again, you can add cardamon, nutmeg, allspice, etc.!)

1/4 cup honey
1/4 cup vegetable oil
2 tbs water

Preheat oven to 300 degrees

Combine the dry ingredients in a bowl and mix thoroughly. Pour the honey, vegetable oil, and water in a small pan and place over low heat until the liquids are completely mixed together. Then pour the liquid (it's hot! Watch out!) into the bowl of dry ingredients and mix until everything's well coated. Finally, pour onto a baking sheet and bake for 20-25 minutes... you'll want to check halfway through and stir things up a bit to ensure that the granola cooks evenly.

Enjoy!

Thursday, October 15, 2009

Today


Today, I made my Armenian grandmother proud. I roasted an eggplant.

I'm quite vocal about my half Armenian half Russian Jewish heritage, and if you know me even minutely well, you'll have heard me boast about each side at least once or twice, despite the fact that I'm up to the third generation notch on both belts.

My pride for my Armenian side definitely does not stand alone, however. If you meet any of the members of my mother's family you'll discover that they too, are quite chatty about any iota of Armenian blood that they've got churning through them. For many this can be quite a puzzling fact... especially upon witnessing one of us meet a person that's actually from Armenia (we tend to say the only five words that we know and lapse into a discussion of what our grandparents have told us about "the old country"). Nevertheless, you only need to do one thing to understand the origin of our strange pride- pick up a plate of Armenian food.

I can imagine it now- one of my grandmother's old white plates, stacked high with with lamb shish-kebab, a generous portion of rice pilaf, yalanchi (our version of dolmas), and a brilliant green salad. On the table is dampened lavash (flat bread) with a nice pile of hand-pulled string cheese that's been flecked with darkened sesame seeds, all accompanied by a platter of cured meats. Now that's a cuisine to be proud of.

And it's the food that brings us together- we celebrate holidays with shish kebab, or lamb burgers (with parsley, mint, and chopped shallots buried within). We bond while shredding string cheese or rolling yalanchis. And now that we've all become so busy, we catch up by talking about it all... from the lavash and klehma to the new baby in the family, and my aunt's latest art project.

Strangely enough, there usually aren't too many eggplants involved in our feasts.... but as I've heard from my cousins that have been to Armenia, eggplant is pretty common (i.e. "I can't eat another eggplant in my life. That's all we ate there. Breakfast, lunch, and dinner.") I'm sure that their experience isn't the true norm, but I figured I might as well keep considering eggplant in my list of "Armenian" foods.

So last week, when I was on the phone with my grandmother, the conversation naturally turned to what I was cooking... and as I mentioned all of the vegetables resting in my crisper drawer that were fresh for the plucking, I felt a long pause on the line. Then the inevitable came: "Why don't you try roasting an eggplant?"

Truthfully, I'm sure that I'm not alone in saying that when I think of eggplant, I can't shake the mushy, grey images of it from my mind. However, given that my grandmother is the family expert on Armenian cooking, and that she roasts and/or stuffs eggplants often, I thought I'd give her suggestion a try. Let's just say, I've already repeated it twice and have another eggplant waiting for me in the fridge.

My recipe is simple, and I like it that way. It also involves tomatoes, and since we're at the final edge of that season I invite you to try this right away!

Roasted Eggplant and Tomatoes

1 large eggplant, or 2 smaller ones
4 roma tomatoes
2-3 tbs olive oil
a handful of fresh oregano
a handful of fresh basil

Preheat the oven to 400 degrees.

Wash and slice the eggplant horizontally into rounds that are about a centimeter or so thick. Wash and slice the tomatoes similarly. Place sliced vegetables in a bowl and toss with a glug or two of olive oil (eggplants tend to absorb a lot of oil so you really just want them coated lightly). Then season with salt and pepper (the salt is really important for the eggplants- don't leave that out!) Next, tear up pieces of oregano and basil to make sure that each slice is covered with some herbs. Finally, place on a baking sheet and throw in the oven. You'll want to cook them for 40 minutes to an hour... the tomatoes will break down in the most beautiful way, and the eggplant should be neither too mushy nor too crunchy.

Eat as a side, or main. I'd serve the vegetables with a poached egg or along side some fresh mozzarella or buratta... and some crustry French bread.

Enjoy!

Wednesday, October 7, 2009

Never fall far from the tree


Recently, I've been thinking a lot about apples.

Well, actually, I've been eating them non-stop. For some reason I'm battling another cold... and much to my pleasant surprise, my two strongest weapons are won-ton soup and crisp gala apples.

I'd love to talk about how apples once spread across the American countryside for the sole purpose of providing hard apple cider for the rugged settlers, or how no single seed from an apple has the same genetic code (so you could potentially get five different trees from one apple!) but I think that Michael Pollan has me covered there.

Instead, I'd like to give you a recipe. This recipe is a reminder that when the newness and wonder of the crunch of an apple wears away, there is an escape.

Baked Apples

4 good-sized apples (preferably less meaty and more crunchy varieties... like fuji's, granny smiths, etc.) washed and cored
1 tbs. unsalted butter, cut into four pieces
1/4 cup brown sugar
1/2 cup walnuts, chopped
1/2-1 tsp. cinnamon (up to personal tastes)
either, 1 can of apple juice and 1/2 cup water or 1 1/2 cups water

Preheat the oven to 375 degrees. Place the cored apples in a glass baking dish that's at least an inch and a half deep.

Put the walnuts in a foil package or on a baking tray and place in the oven. You'll want to bake them for maybe 10 minutes or less- so that they're nice and toasted.

When the walnuts are done and slightly cooled, combine them with the sugar and cinnamon. You can also add raisins or currants here too if you'd like. Then place a portion of the butter in the core of each apple, followed by a spoonful or two of the mixture. Needless to say you'll want it evenly distributed among the apples.

Pour the apple juice/water mixture or water in the bottom of the dish so that the apples are partially submerged. Then place in the oven. Cook for 40 minutes (but check about halfway through or so because you don't want mushy apples!) You'll want to pull them out when they're tender, or when a fork pierces them easily (but doesn't cause them to fall apart!)

Serve with vanilla ice cream or heavy whipping cream.

Enjoy!


Wednesday, September 30, 2009

The (lost) Art of Walking


In the main stacks of UC Berkeley library there's a wall where the librarians display the covers of new books. I was struck quite strongly (actually almost insulted) by one: "The Lost Art of Walking"... mainly because, to me, the art of walking is not lost. On the contrary, it's more alive than ever.

I don't think I understood the art of walking until college- or really until Irine introduced me to its capacity to change lives.

My high school experience resembled a tightly regimented cycle, with music, school, and track practice each occupying a space of time as I ticked through the day. Then college life brought the unexpected- free time. Yet along with the free time came so many new challenges that didn't exist in my routine high school life. I needed some way to cope, some way to let off steam, or at least some way to let the thoughts and worries that collected in my head evaporate into the fresh air.

I don't know when it happened exactly, but on a chilly day my first roommate and now one of my very best friends was also the first person that I really WENT for a walk with. And for no reason other than to escape a dorm room and talk about life. Aside from one particular 1 mile track race, I never felt more alive, with the cold air entering my lungs and my senses so awake.

But it really wasn't just the walking. It was the company.

Irine is the kind of person that makes you want to actually go out and accomplish the things that you only dream about during the drollness of the day. She's also that person that knows how to give just the right advice at the right time... making you know that in the end, everything's going to be fine. Combined with some epic walks, these qualities were enough to inspire me to try so many new experiences throughout the last three years and not be afraid to express myself. I'm so grateful for such a profoundly life-changing friendship.

Our conversations took unpredictable paths as we made our way along tree-lined streets and the more urban landscapes of the city. I remember talking about tough things, really superfluous but refreshing things, and all of those grandiose academic things that we studied on the side. We constructed grand edifices with our words, and knocked them down with hearty laughter. It got to the point where all I wanted to do at the end of the day was go for a walk.

Ann Arbor's got a few really lovely spots for food. One of them happens to be the famous Zingerman's deli, which also has an amazing bakery. Once a week we'd walk out to Zingerman's and get a latte (Irine), hot chocolate (me), and bran muffins. Then we'd amble back to campus for our joke of a macroeconomics course, laughing along the way.

I truly miss those walks, and those muffins. So for quite some time now I've been working on various bran muffin recipes. If you ask my poor roommate James, he's had to try about three or four varieties of bran bread in the last two weeks alone (because I don't have a muffin tin, I've used these baking pans to make "bran bread")... but I've come up with something comforting nonetheless. The base of the recipe comes from none other than Heidi Swanson of 101 cookbooks. She does such a good job of making creative recipes with whole grains and fresh produce that taste superb. I substituted some oat bran, flavored yogurt, and other add-ins to the mixture.


Bran Bread
adapted from 101 Cookbooks

1 1/2 cups whole wheat flour
1 1/2 cups oat bran
1/2 cup wheat bran
3/4 tsp. salt
1 1/4 tsp. baking soda
3-4 tbs. raw cane sugar
2 cups vanilla yogurt... (see note below!)
1 egg, lightly beaten
2 tbs canola oil or melted butter
1/2 tsp vanilla extract (*optional)
3/4 tsp. cinnamon (again, *optional)
1/2 cup walnuts
1/2 cup golden raisins
*If you're really cool, you'll sprinkle sunflower seeds on top.

Preheat oven to 425 degrees Fahrenheit

Measure out the flour, brans, sugar, salt, baking soda, cinnamon, walnuts and raisins into one bowl. Then mix the wet ingredients (yogurt, honey, egg, oil, etc.) in another, larger bowl. Fold the dry ingredients into the wet and mix... but not too much. You'll find that the batter is clumpy and even a bit dry-looking. That's ok!

Pour batter in a large baking pan (or individual muffin tins... maybe 1/3-1/2 of the way down) and bake until a fork inserted in the bread comes out clean. She says 10-15 minutes, but I remember mine taking about 30 or so. Then again, I'm making bread and she made muffins.

* On the yogurt. I've had my best results with non-fat vanilla from Brown Cow. Now I recognize that that brand is local, so I'd just recommend finding a good, thicker yogurt to use (non-fat to high fat is fine) without high fructose corn syrup or any of those synthetic sweeteners! If you want to use plain then go ahead, but just add 1/2 cup honey to the wet ingredients.

Serve with honey, butter, peanut butter, or jam. The bread is best when heated!

Enjoy!

Wednesday, September 23, 2009

Cooking as Catharsis


I hate to be a bit of a downer, but if there's anything I've noticed in the clutters of my last three years at college, it's that there is no place lonelier than a college campus.

True, the immaculate buildings and paved pathways are full of life- students making their way to their upcoming classes, groups of professors engaged in deep conversation, jabbering activists at club tables, coffee-sipping wanderers, and non-university affiliated people, who, depending on what they want from life, are on campus to ask for money, spread some religious speak, or walk their dogs.

That's a lot of action, no doubt. Yet, to me, it seems, if you look behind the surface, you'll find that everyone is just lost in the process of going somewhere. Whether it's a career, a political goal, or a new scientific discovery, each person seems to have an end and is consequently on campus to pursue it. For a hopeless idealist like myself- you know, that person that likes to point out the yellow ladybug on the plant in front of the library where everyone's smoking, or recite a poem, or tell you that she has no clue what to do with her life- it's not so great.

It is nice, however, when I run into someone I know. My heart, which has sunken into my chest upon seeing so many despondent faces on the way to class, leaps up and comes to life. I feel, once again, alive as a deluge of happiness warms my body and I skip to my next class.

When that doesn't happen, I get some pretty crazy ideas.... and by the time I get home my head is spinning and I need some kind of release. Luckily, there's a kitchen for that.

So let me just say, that after a hectic and depressing day on such a lonely cement microcosm, I made an incredible discovery in the kitchen: roasted poblano peppers. Oh man.
I was making a bean dish called "drunken beans," which was fine and dandy, but I swear, the best part of the entire process, the part that made me forget all of my troubles, was what the recipe considered a "topping"- those darned roasted peppers.

Think of it- you start with these shiny green poblano peppers. You then wash and dry them, place them on a baking sheet, and throw the arrangement into an oven burning at 400 degrees Fahrenheit. Then, after a little bit of TLC, you pull them out of the oven and observe their charred skin bursting with flavor and heat. After letting them cool, you peel off the skin to reveal the smooth, flavor-packed pepper itself, which, if you're me, you pull apart with your hands, place on a warm flour tortilla and devour, noticing that your worries and whims have sweated out of you and collected into a puddle on the floor. Then, again, if you're me, your lips will be on fire and you'll need to grab a glass of milk or water. heh.

So, I'm going to stop ranting and give you the beans recipe- which is also delicious. You know what to do with those peppers, whether you put them on the beans or not. I think my next project is chile rellenos. I can't wait.

Drunken Beans with Roasted Poblano Chiles
adapted from Rancho Gordo's suggested recipes
I used heirloom beans, which are great in terms of texture... and they come in really neat colors! See if you can get your hands on them!

1-1.5 cups dried beans (your choice on the amount/type... soaked overnight (see below))
3 pieces of bacon or, what I used: 1 piece of pancetta bacon thickness (your butcher will know what you're talking about!)
1 yellow onion, diced
4 cloves garlic, minced
a handful of mushrooms, diced
1 bottle of Mexican beer (you'll end up using a little over half of it)
3 poblano chiles (sigh)

Rinse the beans and place in a pot, covering them with an inch of water. You'll want to soak them overnight.

On the eve of the cooking day, preheat the oven to 400 degrees Fahrenheit. Cut up your pancetta or bacon in small pieces and throw it in a medium or large pot. Cook at a medium-high heat until the meat is dark and crisp and the fat is rendered (cooked down to a liquid). Add the chopped onions and garlic- if there's not enough liquid in the pan then feel free to add some oil. Then add the mushrooms and stir a bit. At this point I'd add some salt and pepper, then pour the beans with their soaking water into the pot. Bring the mixture to a boil and then simmer at low heat. You'll also want to salt your beans at this time.

While this happens wash the peppers, dry them, and place them on a baking sheet. Then put that sheet in the oven. You'll want to check on them every 10 minutes or so and flip them to make sure that the sides cook evenly. The time to take them out will be when it looks as if the skin of the peppers is evenly charred on all sides (see picture). Take them out of the oven, let them cool, and then proceed to peel the skin away, take out the seeds, and chop the peppers up into bite-size pieces. Set aside in a bowl.

So at this point, you'll want to add your beer to the beans, which will have cooked away a lot of liquid. The amount you add is up to you. I poured the whole bottle in there, which is a step I might revise next time. I'd start with half a bottle and see how you like the way things are cooking. You'll know the beans are done when their texture is smooth and creamy- not starchy. Then you've got it!

Serve the beans with the poblano chiles on top, a squeeze of lime, and warm corn tortillas on the side.

Buen provecho!
Saturday, September 12, 2009

On Almost-Autumn Days and Soup


It's the perfect kind of overcast day. The kind that causes me to mentally check out- leaving my books behind on the table while I stare out the window with the utmost sensation of comfort and warmth within.

I'd like to imagine that these are the days that inspire poetry, reminiscences of autumns past, home-grown football games in damp, grassy yards, and impromptu soirees around steaming cups of tea.

And when the rain sleeks the glossy surface of my window, I know that the draining heat-filled summer days have come at least to a temporary halt... and that's a relief.

If I wasn't sick with what may or may not be swine flu, I think I'd take advantage of this weather to bounce around outside, and then maybe draw a tree or take a picture of a peculiar front door that I find :) but as I've been stuck here, with an overwhelmingly large pot of chicken soup that I somewhat ruined by plunking a Reggiano rind in the mess, I have needed to do something to keep my mind away from simple linear regressions (econometrics homework).

So I'm going to give you another recipe for chicken soup- sans le fromage

Chicken Soup for the Ill and Healthy
adapted from this recipe by Orangette
This feeds so many you won't know what to do with it. I'd actually recommend freezing some. Anyway, I think it's important to have a recipe for chicken soup handy for those times when you do fall victim to microbial beasts.
3 bone-in chicken breasts (or you can mix it up with thighs as well)
1 bunch of thyme
2 leeks, chopped into small pieces- don't be afraid to use the green parts
3 medium sized carrots, chopped into bite-sized pieces
3-4 stalks celery, chopped into bite-sized pieces
3 cloves garlic, diced
2 boxes of low sodium chicken stock (around two quarts... but a little less will do)
1 cup either tiny pasta or rice (I used wild rice)
1 bunch parsley
2-3 cups spinach
Ground black pepper or whole peppercorns
Salt

Preheat the oven to 450 degrees. Wash the chicken breasts and toss with olive oil, salt, pepper, and as much thyme as you'd like... make sure you rub the spices into the skin. Then place in an oven-safe dish and cook for about 30 minutes (you'll want it to be cooked through with golden skin... according to the original recipe). Set aside after taking them out of the oven

In a large stock-pot saute the leeks in some oil until they're translucent. Add the garlic, carrots, rice, and celery and saute for a few more minutes. Then add some springs of thyme, salt, and black pepper.. feel free to add any more spices that you see fit. Finally, add the whole chicken breasts and then the stock. You'll want to bring the whole mixture to a boil and then simmer, for maybe 30 minutes or so... until the vegetables are tender. During the cooking process, add as much chopped parsley and spinach as you'd like. When everything looks like it's cooked the way you'd like, then take those chicken breasts out and shred the meat from the bones, adding it to the soup.

I'd serve it with a squeeze or two of lemon and some fresh parsley on top.

Enjoy!

Monday, September 7, 2009

Spices


I can say that I now live with a spice purist.... and I think I might be a convert.

I used to be one of those people that ambled down to my local grocery store and picked up the generically packaged (or scooped from the bulk-size bucket of) ground spices. I'd store those little glossy jars in a cupboard and pluck them accordingly for my cooking needs, sprinkling the various powders in pots of bubbling curries and stews.

Woah. Wrong picture. Well, right picture, but not in this apartment! Those jars are now filled to the brim with whole spices... and an old coffee grinder camps out on the table nearby, ready to grind any spices that come its way. I promise, it's a good thing. You won't believe the difference in flavor.

I guess my point here is that grinding your own spices isn't just an exercise for the bold and daring. It's actually pretty common in traditional cultural cuisine. And the real kicker is that it's not expensive at all. I mean, they're the same spices, just not ground up and ready to go. You can even grind a decent amount and store it in those cute little jars :)

So just in case you have an old grinder, and feel like being a tad adventurous, here's a recipe for Garam Masala... taken from this random website. The result was great- I'd make a curry right away if I were you!

Garam Masala
You'll need a grinder of sorts- I'm sure that a Cuisinart would work fine... but we used an old coffee grinder

Ingredients:

2 tablespoons cumin seeds
2 tablespoons coriander seeds
2 tablespoons cardamom seeds
2 tablespoons black peppercorns
1 (3-inch) stick cinnamon, broken up
1 teaspoon whole cloves
1 teaspoon grated nutmeg (yeah... grate it yourself :))

Instructions:

Put all ingredients except the nutmeg in a skillet over medium-high heat and toast the spices for about 10 minutes- you'll want them to be a darker shade and to be emitting wonderful aromas! Then set aside to cool. When they're pretty cool, transfer them to a coffee grinder or Cuisinart and grind away. Then add the grated nutmeg and mix. After that, you can store the mixture in an airtight container for 3 months. This recipe yields 1/2 cup according to the site, but I'm convinced that we got more out of it.

Enjoy!

Monday, August 31, 2009

Back in Action

Hello-

I thought I'd take advantage of the last (and second) post of August to apologize for the lull in posting activity on the site and say that I am, dutifully, even if it takes me writing about sauteed zucchini and almonds, back on board.

I have to say, though, there was a reason (aside from being busy with school and work) that I didn't post much this last month. The impossible occurred- I became uninspired by food. At the end of the flurries that were my summer days, I ate the most simple concoctions, followed by a beer. Sometimes, I even skipped the concoctions. Heh.

So now I'm armed with a new kitchen and a new desire to get back into the wonders and creativity of the cooking process. Yet, to overcome this slump that I've fallen quite unexpectedly into, I'm going to need to take baby steps... starting with breakfast.

So today, instead of eating a couple bites of yogurt, then a few walnuts, followed by a piece of fruit, I tried to put the facets of my morning routine together, with a little cinnamon on top. The result was more inspiring than I expected. Along with a cup of green tea, I got a taste of the bliss that I used to come across everyday when I ate. Here's to a good start.

Saturday, August 1, 2009

The Breakfast Club


There was once a time when I woke up solely for the purpose of opening a door.

Well, it wasn't just any old door- it was the door to 2809 Frederick, my freshman dorm room. My amazing roommate Irine and I would awake from our respective slumbers, stumble out of our beds, and get ready for class. I'd blast some random music from my computer, which, I admit, had a known history of getting stuck in our heads throughout the rest of the day (there was an unfortunate incident when Bob Marley ran continuously through Irine's amply knowledgeable mind on a day in which she had three exams...my fault!). When we were completely ready, Irine and I would open our door- and that's how the day began.

You see, waiting for us outside the door (maybe leaning against the hallway walls, or sitting on the 70's style carpet) was a group of pretty wonderful people (of which Ana was a member I might add!) Our very good friends happened to also be our neighbors- I don't know a time when that will ever occur again in my life. And for a brief moment, I believe, we'd all rub our sleepy eyes and realize that we were all so lucky to be together. It was with this group of people that I witnessed my first snowfall, laughed my way through an "honors" classics class, saw "Dirty Dancing" for the first time, played on a broomball team, and stole cafeteria trays to slide down snow-covered hills.

After reuniting in the hallway, we'd begin our routine. Our pathway never changed- down the stairs, through the commons, past the small newspaper stand (two of us would grab a paper), and across the way to the dorm across the street. The mornings were silent, so we entertained ourselves with squabbles, jokes, and the occasional question about the upcoming class that we shared together.

By the end of the first semester, we began calling ourselves the Breakfast Club. We were quite the raconteurs in the somnolent scene of the cafeteria. We'd sit next to tall basketball players and crew team members, and as they chugged down their protein filled breakfasts, we'd snap at each other about politics or laugh about the most random things.

There was another reason I got up though- breakfast itself. If you can't tell already, I live to eat... so one of my favorite things about the cafeteria that we frequented was the fact that it had a decent collection of fruit. Quite often, we'd see melons, grapes, pineapple, and, if we were lucky, bananas.

Bananas were not an everyday occurrence, but when they did make an appearance, they were of the perfect ripeness. It seemed like on days when they didn't serve bananas, slices of banana bread would appear next to the fruit. Perhaps, this was some kind gesture to save us from eating overripe bananas. The banana bread was quite the saccharine concoction- but it provided enough of a sugar rush to take on our first class in one fell swoop.

Breakfast has a fond place in my heart for many reasons, but one of which is definitely the Breakfast Club. Whenever I come across banana bread, I think about the days when I ate in a dorm cafeteria and lived with 1200 other people (or something)... and although I don't think I could live like that again, I remember liking those days. a lot.

Now that I'm home, I once again see bananas on a daily basis... and about once every couple of weeks three of them get a little too ripe. So I make banana bread. I've experimented a lot with recipes, and taking health into concern I've discovered a wonderful one that doesn't require any butter. It's quite famous as it has been debuted here and remastered here.

So here is my version! It has walnuts instead of chocolate chips, and a bit less sugar.


A Slightly Healthy Banana Bread
Only very slightly adapted from the two versions above

1 1/2 cups flour
3/4 cup sugar
1 tsp baking soda
1 1/2 tsp. cinnamon
1/4-1/2 cup chopped walnuts
3 very ripe bananas (preferrably medium to large sized), mashed
1 tsp vanilla extract
2 large eggs

Preheat oven to 375 degrees. Grease an 8" x 5" pan (or whatever you'd like!) Mix dry ingredients in a large bowl and the wet in a smaller one. Add the wet ingredients to the dry and mix well. Pour mixture into the pan and set in the oven. Cook for 35-40 minutes, or until a toothpick inserted in the center comes out clean.

I added granola to the top of this one for fun.

Enjoy!


Tuesday, July 28, 2009

Peter Piper

Every week, my mother wages a small battle with the pepper vendor at the farmers' market.

I can imagine the scene- the man with an aspen green apron behind a beautiful fiery display of peppers, ranging from the lightest green to the most brilliant red, all lying peacefully on the table as if they had just been plucked carefully from the sun. And along comes my wonderful mom, ever-vigilant, and, pointing nicely to a particularly orange pepper, she asks: "Is this one hot?"

Well, what is the man to do? His taste buds are as different from anybody's (as the diverse arrangement of peppers on the table indicates). His wares must always be scrutinized as such- by levels of heat. So he replies: "No, no, don't worry." My mom trusts him, buys the peppers and brings them home.

She does miraculous things with those peppers- cooks them over the free flame of the grill or sautes them with with a mellower gathering of vegetables. And when my mother, brother, and I sit down to eat, we immediately reach for the beautiful plate of peppers.... and then we all clamor for breath as tears fall from our eyes and the peppers scorch our tongues.

The episode repeats the following week, with my mom assuring us that she got new peppers from the pepper farmer, and that this time he said we wouldn't have any problems.... and then we can't seem to handle them either! Not to mention, we're a family that can take some spice. Growing up on Mexican lollipops dipped in chili powder and hot sauces in the fridge, my brother and I aren't too sensitive to the heat. Nevertheless, we had to keep stepping down the pepper scale, just until we reached these guys...


They're Fresno chiles, but if you buy Serrano or Anaheim, you'll get a similar feel. I'm not going to give a formal recipe, but I'd recommend removing the seeds and pithe (apparently, it's the pithe that carries the heat, not the seeds!) and cutting them in half lengthwise. Then add some oil to a pan, and saute some garlic and shallots. Add anything you'd like- we like leeks and zucchini, and then the peppers. We let the ingredients carmelize in the pan, until they break down into a mess of flavors. It's amazingly delicious and simple... and if there's not enough flavor for you, then throw some fresh oregano, or dried thyme in there. Serve alongside a grain or meat with some salad, and you've got dinner.

Tuesday, July 14, 2009

My kitchen

In all honesty, I should probably entitle this post: "My mom's kitchen" because it is my mother- the full-time navigator of the corporate world, the endless burst of energy in human form, and the best mom I could ask for- that made the kitchen the most comfortable space in my home.

You see, being home for the summer means readjusting- relearning the rules of the kitchen, the nooks where certain utensils, pots, and pans reside, the corners where we hide the jars of plum-raspberry jam from Fresno, and the surfaces of the counter top that are prone to get messy and therefore must be kept under vigilant watch.

Unfortunately, in this three person home, my mom's kitchen is also a "one person at a time" kind of place. It's really not an issue of physical space (multiple people could comfortably cook at once in the room) but rather of mental space. When my mother, brother, and I are in the kitchen, the energy is unstoppable. The room transforms into an arena, with two people challenging the one proposing to cook to a competition of words. Ironically, the person wielding the pots and pans is in danger- the other two are free to attack on all verbal fronts. My brother and I reproach my mother's recycling habits, my mom and brother ridicule my predilection towards beans and tofu, and my mom and I LOVE making fun of my brother's cleaning habits. Oh man.

Anyway, I say this in jest. People are totally welcome to come over and cook- but when it's just the three of us, things get dangerous. That's partly why this blog has been barren for the summer (aside from that lovely Turkish coffee post, you saved me Ana!)- it's HARD to get in that kitchen and cook. I'm telling you!

But sometimes there's no verbal warfare in the kitchen. It's as if we all relinquished white flags before entering the room. In fact the only thing one can hear is music. On these evenings, my mom will come home from work and put some of the most soulful, meaningful, and creative music that I know on the little kitchen stereo. The familial discussion will cease, and the foot stomping on our worn wooden floors will commence. Any potential difficulties cooking together disappear, as my mom and I shout the lyrics to the amazing music and dance like there's no tomorrow. I find myself singing songs with crazy titles like: "Free Man in Paris" and with lyrics along the lines of: "Tin soldiers and Nixon's coming. We're finally on our own!" As we sing and dance, we cook- it just works, no one says anything, we just each take a role and know what to do. Generational gaps crumble in that kitchen. Words no longer have any meaning...well, unless they're the lyrics to a song.

At about the time that I finally realize how ridiculous I look protesting the Vietnam war in the middle of my kitchen, and that I am not at Woodstock, dinner is ready to be served. We turn the music down, exhausted, and sit down to eat. My dog, who already has no idea what the heck we're doing, sighs heavily and lies down, defeated, under the table. What a catharsis.

Last night was a similarly great experience. My mom was out to dinner so my brother and I put on an old CD from our childhood and cooked away. We made some fajitas and rice, adapted from recipes from some lovely books. I thought I'd share them with you, as they were quite delicious.

So here's to music, company, and kitchens. Three things that have made my life that much richer.

Improvised Fajitas
(with a spice mixture adapted from "The Complete Mexican, South American and Caribbean Cookbook", a gift from a truly remarkable friend :))

1/2 yellow or white onion, chopped coarsely
2 cloves of garlic, minced
1 bell pepper chopped
1/2 serrano or similarly spiced pepper, chopped
2 tomatoes, chopped
leftover cooked chicken, beef, or grilled vegetables
1 1/2 tsp. sugar
1/2 tsp. cinnamon
1/2 tsp. oregano
1/2 tsp. chile powder
dash of cayenne pepper
salt and pepper to taste

Heat some oil in a skillet on medium heat. Add onions and garlic and cook for a few minutes- until onions are translucent. Add bell and chili peppers and cook, again for a few minutes. Add spices, tomatoes, and meat/grilled vegetables. Cook for a good amount of time on high heat, then, if there's a lot of liquid in the pan, bring heat down to low and cook on a simmer.

Mexican Rice
(adapted from "Cooking with the Seasons at Rancho la Puerta")

1/2 white onion (or other half from fajitas), coarsely chopped
1 clove garlic, minced
1/2 serrano or similarly spiced pepper, chopped
1 carrot, minced
1 tsp. California chile
1 cup long grain rice
1 medium tomato pureed with 2 cups water
salt and pepper to taste

In a medium saucepan heat a small amount of oil. Add onions, garlic, carrots, and pepper and cook for a few minutes, until onions are translucent. Add the rice, chile powder, and a bit of salt and cook for a minute. Add the tomato puree to the pan, bring mixture to a boil. Then turn heat down and simmer mixture for thirty minutes (I'd check on it after 20)... until rice is fluffy.

Enjoy!

Monday, July 6, 2009

Hurrah!

Two (hopefully thoughtful) posts coming soon! For now three pictures:

One to construct haiku's to:

One to applaud my brother's breakfast making skills:

And one for a bit of inspiration:


Ok, I will continue talking incessantly about food again very soon!!

Sunday, June 28, 2009

Guest Post: Turkish Coffee


Hi everyone...as you can see by the title this is not your favorite Kelsey anymore but a friend of hers who asked if she might add to the general spirit of this blog by contributing a guest post. I won't be nearly as whimsical and creative as her (and let's face it, who is?) but I hope this might at least somewhat compliment all the amazing things she has going on here!

To begin with, let's clarify: I am no authority on Turkish coffee. In fact, I should probably apologize in advance for posting this in case someone who is a professional Turkish coffee brewer reads this blog and finds my methods offensive or in any way distasteful. I am no connoisseur. But I do think it has a valid enough social meaning to many people and cultures to be on this blog!

My parents are Serbian, and as far as Serbians are concerned, Americans don't know what coffee is. The stuff they sell at big-name coffee shops? It's just dirty water to begin with. Then we go ahead and add milk, cream, and sugar to it? Crazy Americans! [Note: The author of this post worked in a coffee shop herself as a barista and means no disrespect to coffee fanatics whatsoever.] Long story short, to Serbians - this is coffee: the dark, rich, frothy coffee that has all the grounds boiled right in, and collecting at the bottom of the cup.

And the thing about coffee with Serbians is, they drink it all the time. Not like Americans though. If you step into anyone's house in Serbia (which happens all the time, as people pop up totally uninvited as a way of life), there is immediately an ibrik* on the stovetop anticipating your Turkish-coffee-drinking, and some fancy dessert is pulled from behind a magic curtain. You are here to stay, at least for a while, and chat with your host about your house, your family, the weather, those crazy teenagers, and the crick in your neck that you just can't seem to get rid of. My point is, Serbians don't buy coffee on the go, they don't drink coffee in their cars, and they certainly wouldn't dream of having a cup by themselves. Turkish coffee is all about the experience of sitting down and socializing. And, luckily, it tastes wonderfully.


Some tips:

1) I learned this from my dad: Don't sweeten your coffee. Instead, eat something very small and very sweet like these walnut bars with a hint of lime with it. That way, you can alternate between the bitter (but tasty) coffee and sweeten your pallet with a fun dessert.

2) For a rowdy good time, try fortune telling after you've sipped all your coffee! It sounds ridiculous but this is the most fun part, in my opinion (and goes precisely with the theme of socializing). I have no idea how you are actually supposed to tell fortunes with your coffee grounds, but basically what I've been doing with friends is just drinking all the coffee, swirling around what's left of the coffee and grounds for a little bit to mix it well, and flipping the cup upside down onto the saucer. There, you let it dry for a few minutes and when you pick the cup back up, pretend you're looking at a cloudy sky and try to see some images in them and tell a story. When my mom was teaching me how to make this, we found we could see a llama, a koala, a road leading somewhere, a man, and something medical (I forget what). We concluded based on the placement that the llama indicated my past (study abroad in Chile), and the koala was on my 'road to the future' (clearly I'm going to Australia). And there is a man there I am going to meet, for whatever reason (I'm not one to dream of romance or weddings all that much) who will either be a doctor or will need me to help him somehow. Anyway, it's fun!


Turkish Coffee
~the only way I know how~
____________________

Items needed:
1 ibrik
Turkish coffee sized cups (like tea cups, they are small)
Turkish coffee (not just any coffee)
Sugar

Directions:
  1. Measure out water for the ibrik by simply filling one of the turkish coffee cups as many times with water as you have people you are making coffee for.
  2. Mix in a little sugar, to taste, to the water. (If your'e just starting, try about 1 tsp sugar per cup of coffee you are making).
  3. Boil the sugar-water mixture, remove from heat.
  4. Pour ONLY 1 cup's worth of water back into one of the turkish coffee cups.
  5. Add about 1 tbsp coffee to the ibrik for each cup of coffee you are making. You can add more if you want it stronger. Stir well with a metal spoon.
  6. Return the ibrik to the flame, BUT BE CAREFUL BECAUSE
  7. Allow the coffee mixture to heat up, watching carefully, and to rise in the ibrik as much as you can without letting it overflow. Seriously, the coffee rises quickly so watch this (it's pretty cool) and try and remove it from the flame just before it boils over in the ibrik.
  8. Pour the previously removed water back into the coffee mixture (my mom says she's guessing this is to help you NOT boil over the coffee mixture, but she's not sure).
  9. Stir for a little while - if you've done it right, it should be kind of foamy/frothy near the top. This is the mark of good turkish coffee. =)
  10. Use a spoon to evenly distribute the frothy part between all of your cups before pouring coffee from the ibrik into each cup.
  11. Let the coffee settle (you don't want to be drinking the grounds).
  12. When it has settled for about a minute, enjoy!


Saturday, June 27, 2009

Lessons Learned in a Kitchen


My first job was at a breakfast cafe in my sleepy hometown. The place was pretty settled among members of the community, and, for that reason (as well as costs) it hadn't gone through any of the repairs and renovations that it truly needed. Practically every piece of machinery in the place was in a constant state of disrepair. Because of this fact, I consider it the ideal "first job"- any place that I worked at afterward seemed like a luxury.

Take, for example, the espresso machine. The machine itself was the most archaic, coffee grind- covered contraption I've ever seen. Perhaps the only recognizable part was the milk steamer (which was also the only portion that worked). The temperamental machine had a tendency to explode about five times a day, releasing the still-brewing espresso on the unfortunate staff member that happened to press the ground beans to the metal filter. Thus, when someone ordered a double latte, I found myself emitting a deep sigh as I approached the machine with caution, envisioning how I would coax it into producing espresso without losing another shirt to a coffee-spewing temper tantrum.

The other slightly old- fashioned aspect of the place was the fact that there was no computerized ordering system for servers. In fact, we'd take down orders on a piece of paper and bring it to the kitchen, handing it directly to the chef at the burners. While I disdained the espresso machine, I loved this aspect of the job. I felt as if I was truly setting up a line of communication between the kitchen and the customer.

But there was actually another reason that I loved running these pieces of paper back and forth between the kitchen and the main floor- Oswaldo. Oswaldo was the gentle giant of the kitchen, a middle-aged Peruvian chef with gray hairs peeking out of his beard and friendly eyes. He had an innate ability to prepare up to eight omelets at a time on that multiple-burner stovetop. He sang in a deep tenor as he carried out the trash bags at the end of the day. Best of all, he never got angry. He'd just say: "es ok".

At the time my Spanish skills weren't too great. After all, I hadn't gotten to the "food terminology" section of the Spanish high school curriculum. Oswaldo got a kick out of my attempts to explain complicated orders... and began to predict what I was going to say. After all, I began every attempt to communicate an order with "Well. it's a little complicated". After I handed him the order, an exchange between us might have gone like this:

Kelsey: "Oswaldo... er....esta persona quiere...er...es un poco-"
Oswaldo: "Ya lo se. Un poco complicado? Es ok. A ver... huevos revueltos con cebolla... es ok."

Oswaldo's combination of English and Spanish into the little phrase "es ok" seemed to calm me for a bit. Then, upon realizing that I should probably just stop trying to speak in Spanish to him, I'd reel, running out of the kitchen to leave the blaring mariachi music for the hustle and bustle of the main floor.

Yet, for some reason, I kept trying to explain things in broken Spanish. One day, I think Oswaldo realized that if I wasn't going to give up trying to speak Spanish to him, he'd have to start teaching me a bit. So that's how it began.

Well, actually it began with the Spanish word for egg yolk: "yema".

When a customer had ordered an egg-white omelet, I brought the order to Oswaldo. He turned his back temporarily on the sizzling omelets and bacon to tell me: "sin yema- Y-E-M-A". Our mini-kitchen lessons continued- with jamon, tocino, ajo, cebolla, pimientos.... he was a better teacher than he probably realized. I was grateful for his patience, and even started trying to crack jokes with him (he didn't find any of them funny). But really, it's people like Oswaldo that influenced this deep love that I have for Spanish language. I have learned more Spanish from real people with beautiful stories and incredible talents than I did in my years studying vocabulary lists and reading short stories in the classroom.

I'd walk home my long days at work with a leftover scone in hand and a string of new Spanish words running through my head. The scones were a pretty phenomenal end to the day- and I had a lot of good ones to choose from- they had everything from the traditional oatmeal raisin to the more adventurous pumpkin spice and cranberry orange. Yet, my favorite scone was the currant scone. I loved how each bite was permeated with currants and a buttery crumble of scone. So I thought, slightly in honor of my first job with Oswaldo, I'd replicate the currant scones.

I used this recipe by Dorie Greenspan- it yields a light scone, perfect for a lazy Sunday morning with a cup of milky coffee.

Dorie Greenspan's Raisin Scones (with currants)
shamelessly stolen from her website!

1 large egg
1/2 cup milk
2 cups all-purpose flour
2 1/2 Tbsp sugar
1 Tbsp baking powder
1/2 tsp salt
6 Tbsp cold butter, cut into bits
3/4 cup raisins
(or currants)

Preheat the oven to 400ºF. Mix the egg and milk together in one bowl and the flour, sugar, baking powder, and salt in another.

Place the butter into the flour (don't forget to cut it into smaller pieces!) and, using your fingers, mash the two ingredients together until the mixture becomes "pebbly". Add the milk and egg. Mix with a fork until everything is incorporated. Add the raisins (or currants) and stir a few more times.

As Dorie says: "Spoon a dozen mounds of dough onto a foil-lined baking sheet and bake for 20 to 22 minutes, or until the scones are golden brown. Cool for a few minutes. Serve warm with butter or jam, or a little of each."


Tuesday, June 23, 2009

An Equal Opportunity Chicken Salad


I'm usually not too particular about what I eat (as long as it's fresh!) but there is one thing that I really dislike to see in large (or even medium-sized) quantities in a dish: mayonnaise. Actually, I dislike all condiments in general.

Somehow, I find it really discomforting that I don't know how ketchup and mayonnaise are made. Frankly, I don't want to know- I think that vegetables alone are the perfect additions to a sandwich or burger and that anything else just adds superfluous flavor (well, I think I make an exception for guacamole or home-made hummus).

For this reason, I tried to avoid chicken, potato, and other mayonnaise-filled salads for a long time. I was pretty skeptical, and still am. Yet, when I came across a chicken salad recipe without mayonnaise, and instead with a nice light vinaigrette, I thought I might give it a chance. I'm glad I did.

This salad is really crisp and refreshing for a hot day. I like to eat a bit with some whole wheat toast before I trounce down my hill to face the real world.
Chicken Salad
Adapted from Gourmet

1 large chicken breast (already cooked, but if not then just poach it)
2 celery ribs, chopped into little half-moon pieces
a handful of grapes, washed, dried, and halved
1/4 cup walnuts (you can toast them, I didn't)
1 tbs. chopped shallot
1 tbs olive oil
1 tbs lemon juice
1 tbs vinegar (champagne, red wine, etc.)
salt and pepper to taste

Peel apart the chicken breast into small strips and place in a large bowl. Chop the shallots and drop the pieces in a smaller bowl with the vinegar and lemon juice (so that they macerate a bit). Add the grapes, chopped celery, and walnuts to the large bowl with the chicken. Mix the olive oil in with the vinegar and shallots and taste- you may need to add more oil if it's too acidic. Otherwise just toss the dressing in with the salad and toss again. Enjoy!